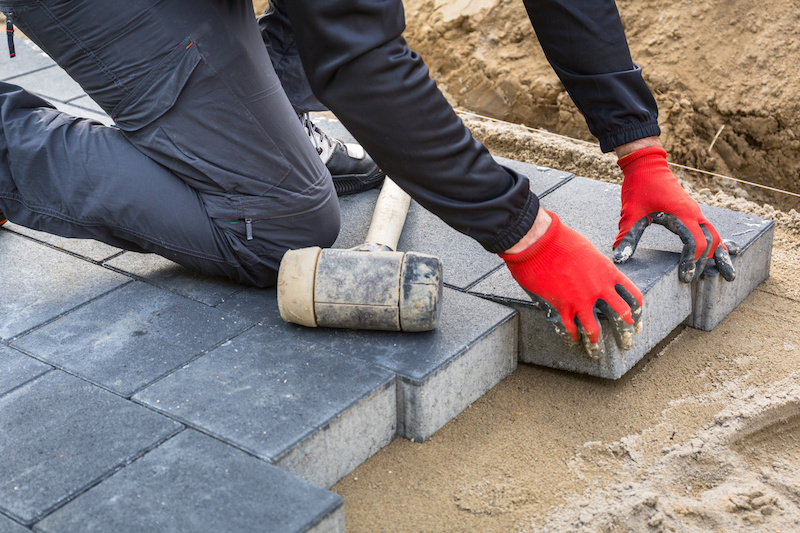
Interlocking concrete blocks are a unique form of pre-cast concrete blocks that are designed to hold together by using pre-measured holes and depressions. They’re built with unique profiles and features, allowing them to fit perfectly into each other without the use of any mortar. Instead, the cementitious blocks simply snap together with each other, making a highly durable and sturdy material.
Interlocking cement blocks are made to be used as part of the building process since they’re affordable. This is why many home remodeling projects employ interlocking blocks as a building material. Additionally, there are many benefits when using this type of concrete construction material.
However, for these blocks to be effective, it’s important that they’re correctly installed. Otherwise, you might be in for a faulty and regrettable project. This article highlights the basic steps for you to follow.
1. Determine Your Desired Size Of Concrete Blocks
One of the first steps in installing interlocking concrete blocks from Envirocon is to determine exactly what size your desired blocks are going to be. As with any product, there’s more than one way to measure. Also, it’s always best to measure the space where you want to install them before deciding which type you’re going to use.
If you have a large area to work with, there are different sizes and thicknesses to choose from. But if you’re working with smaller areas or a smaller budget, it’s best to settle for the size that you have in mind in the first place.
Visit https://envirocon.co.nz/ for a wide selection of these different blocks, according to size, thickness, and other preferences you may have.
2. Mark The Area
Once you’ve got all the materials ready, double-check the entire area where you desire to place the blocks. Check the area for any inconsistencies that can affect the smoothness of the concrete block’s final result. If there are any holes or gaps, now’s the best time to fill it up with sand or rocks.
After doing so, use a powder to mark the area where the interlocking concrete blocks will be installed. This will make it easier for you to remember the space, especially when you’re going to start drilling.
3. Dig The Soil
As you begin digging the soil, take the time to check for any loose fragments or remains. After going through this step, that’s when you can start digging or unearthing, according to your preferred depth.
The standard measurement, however, should be at least six inches to hold the gravel, soil, and crushed soil. If you’re using the interlocking concrete blocks for your driveway, you need to dig at least two inches more.
4. Lay The Bedding Sand
The process of laying the bedding sand involves putting sand on the surface until it’s level and smooth before laying the new base. To create an even and durable surface, you should use an equal amount of cement on both sides of the grout. Generally, the mixture for the bedding sand should be around one inch deep.
A stable bedding sand is needed to ensure a fine and perfect level. More importantly, it’s a strong support base so the concrete blocks will stay in place.
5. Install The Edge Restraint
A stable edge restraint is important since it can remove any form of movement caused by the sand bedding and the blocks.
Some of the common examples of edge restraints include an existing hard edge, such as the sides of a house. Other kinds are concrete restraints and molded restraints.
6. Lay The Interlocking Blocks
When you start to layer the interlocking blocks, you can lay it down by following the pattern that you’ve intended for it to show.
Take your time when going through this process as you want the alignment to be perfect. The goal is for all the concrete blocks to interlock properly.
7. Cut The Edges Of The Blocks
Cutting the edges of the blocks is more of a step leaned towards the aesthetics of your concrete block project. It helps to give off a final result that’s seamless, neat, and clean-looking.
8. Vibrate Or Sand The Blocks
Once all the blocks are in place and the edges have also been cut and refined, you need to spread a layer of sand over the pavers. Once this is done, run a vibrating plate compactor all over it at least twice so that the interlocking process can commence. If there’s any remaining sand, sweep it into voids until these are all filled.
The dry sand that you spread on the area should be around ¼ of an inch deep.
Conclusion
Concrete blocks can be cut and drilled for a variety of purposes. They can even be used as the foundation of an entirely new building or they can simply be used as the basis of a new home structure.
As highlighted from the steps enumerated above, these types of blocks are also easy to work with for any home improvement project. If you’re looking for ideas for your next home improvement project, you might want to consider using interlocking cement blocks.
